Sunday 10 June 2018

Our Frugal DIY Black Soldier Fly Larvae Setup

After I killed a couple of batches of earthworms and my bokashi bin just went soggy, I knew I had to find a better way of composting food waste - and I'm so glad we found out about black soldier fly larvae farming!

My elevator speech as to why I love my grubs:
  • In our climate, they pitch up on their own! No cash outlay required.
  • They don't spread disease like houseflies do - Adult black soldier flies don't land on food because they don't even have mouthparts and they prefer to lay their eggs in a dry spot above rotting food, not in it.
  • BSF larvae dramatically decrease the number of houseflies. The actual mechanism for this is unclear but it seems they consume the waste quicker than housefly larvae can hatch.
  • They eat pretty much everything that comes out of our kitchen so definitely not as fussy as earthworms, and less effort than a bokashi bin. Any and all food preparation waste and all our plate scrapings (except bones) go to the BSF larvae.
  • When the grubs are mature, they self-harvest, providing us with an excellent source of fish food, and one day, chicken food.
  • The leachate (liquid) harvested from the farm is an excellent fertilizer.

So, the moment you've been waiting for... Our Frugal DIY Black Soldier Fly Larvae setup!
I'll warn you it's quite rough and ready, we're still experimenting so we haven't made the fittings and supports permanent, but it works!


In all her creep crawly glory - Our Black Soldier Fly Larvae farm

So there you can see the setup in its entirety. It's an old bath - salvaged by my father-in-law who works as a builder, set up on some bricks. Underneath is a container to catch the leachate. The red bucket catches the grubs coming out of the ramps inside. The cover is a piece of aluminium that extends slightly longer than the length of the bath so it covers over the bucket also.

If you lift up the lid and look from the top near the bucket end, this is what you'll see. A discarded section of pool cleaner pipe, cut in half lengthways. When BSFL are ready to pupate, they climb upwards towards a dry spot - so ramps that drop off into buckets work well for harvesting! You can just see the edge of the bucket on the right-hand side of the picture below. One ramp along one side of the bath exits over the top edge, while the other pipe (currently too submerged for my liking) exits through the 'overflow' hole.


You can see citrus peels, egg shells, tea bags, avocado skins and various other bits of debris in this image. The dark marks you can see on the edge came about when it rained and we didn't have sufficient rain protection. BSFL can crawl up vertical surfaces if they are wet, thus bypassing our ramps (and our buckets!). I just haven't bothered to clean the previous trails since setting up the system with the new cover.

Above is a closer view of the pool pipe dropping off into the collection bucket, with a layer of grubs already in the bucket. Below is a close-up view of the grubs working their magic.


And this is what they look like in the bucket. Mature larvae have a dry velvety surface and are about 2cm long. They don't smell bad at all - unlike housefly larvae that stink! To start the system we left some old meat in a bucket, with sections of corrugated cardboard fixed above the meat. The Black Soldier Flies love laying their eggs in the crevices formed by the cut edge of corrugated cardboard. Obviously, the houseflies will come, but over the course of a few weeks, the Black Soldier Flies come to lay their eggs and voila! Black Soldier Fly Larvae! I'll try to get a pic of one of the flies so you know what they look like. They're quite sweet actually - longer than houseflies, with little bobbles on the ends of their antennae.


The reason we've lifted the whole setup slightly off the ground is so that the leachate that runs out via the plug hole can be easily reached. The runoff process is assisted by the natural drainage slope of a bath. To prevent the drainage hole from getting clogged with debris, we placed a broken swimming pool weir basket upside down over the plughole. Below is a closeup of the leachate collector. We need to find something a little larger but this is working well for now.


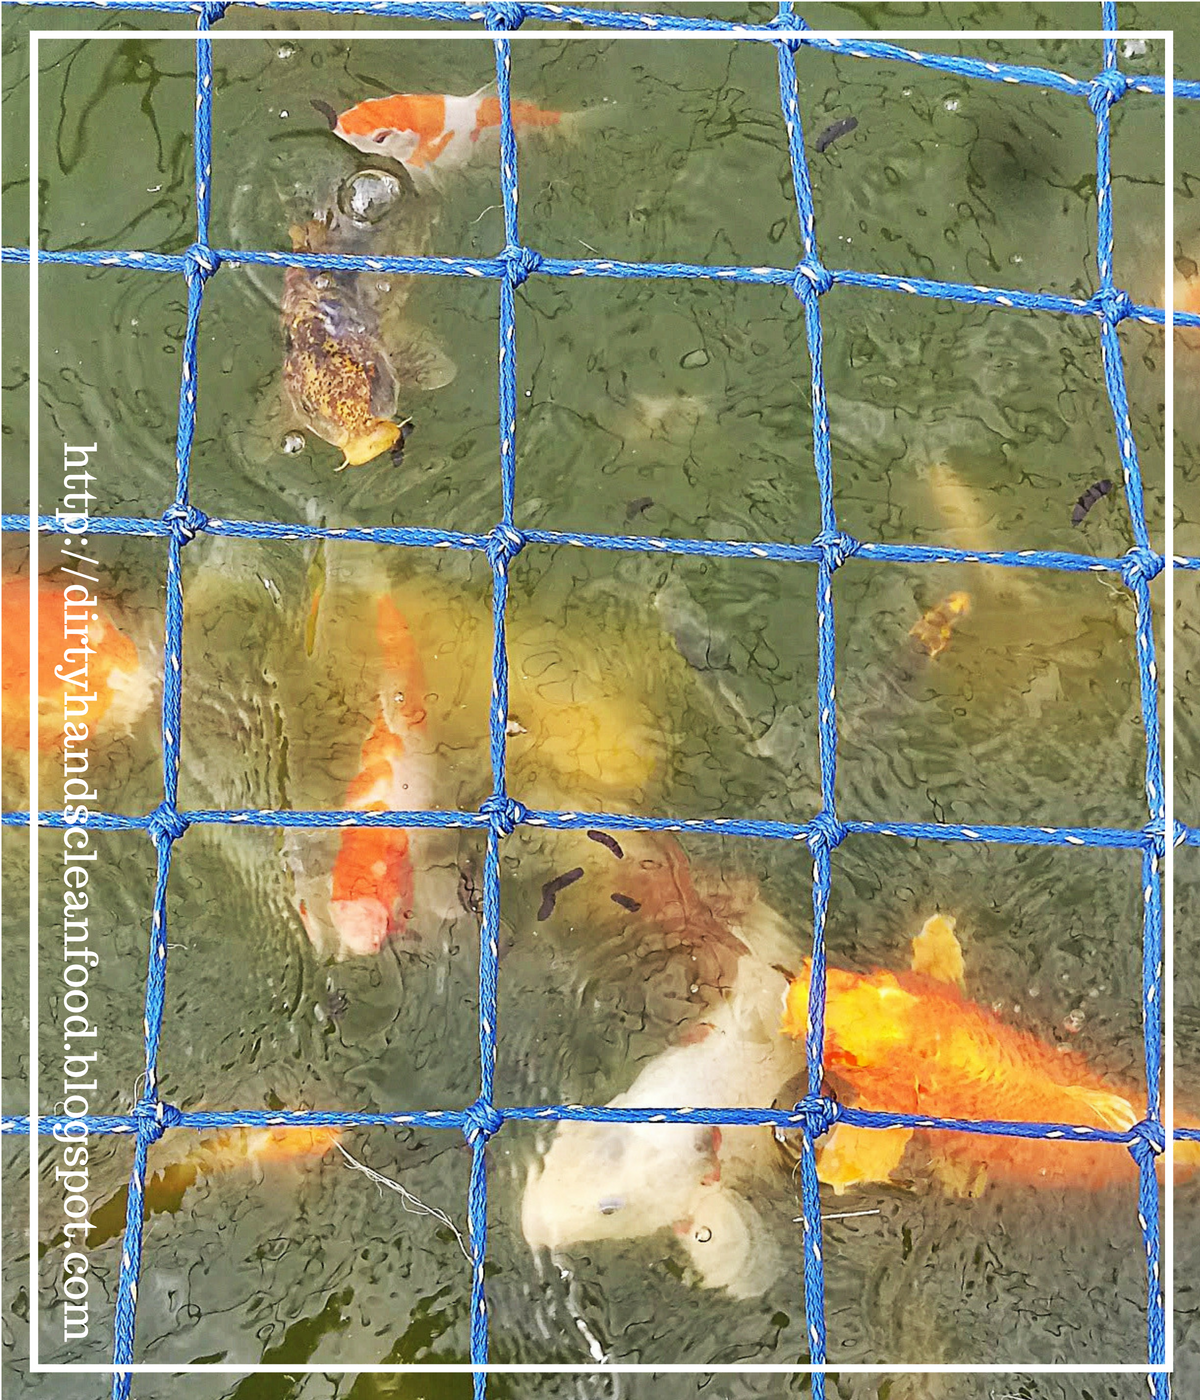
And below you can see some shots of our bigger koi feasting on the grubs. The smaller koi are there in the hope that we'll drop some smaller food in as well.


So that's the quick version! If you have any questions, ask them in the comments below.


Tuesday 21 July 2015

May 2015 Part II - The 'Dirty Hands' part of Clean Food

I think the hardest work of all in a garden is getting a bed ready for its first planting... 

...that and waiting for seedlings to germinate. This is especially true in our case where we're trying to grow garden where previous property owners saw fit to dump builder's rubble.

"Dietes grandiflora or Fairy Iris" by Rojer Wisner
Licensed under CC BY 2.0 via Wikimedia Commons
So I planted the top bed a while back and my new seedlings were just about ready to be transplanted, so the time came to start up the second of the top beds. I wish I had taken a photo of this bed before I got hold of it! 

It was also full of rubble - many of the rocks you see making the middle path in the image below, I dug out from under the ground. The swales or mini-terraces on either side were also made out of the builder's rubble I extracted. 

"Rhoeo Tradescantia spathacea" by Tauʻolunga
Licensed under CC BY-SA 3.0 via Wikimedia Commons
It was full of Dietes grandiflora (Fairy Iris), Chlorophytum comosum (Spider Plant / Hen & Chicken) and Rhoeo spatheca (aka Oyster plant aka Moses in the Cradle) and with a bunch of weeds in between.

I started by taking out the Rhoeo and Dietes plants and ended up replanting them in the front bed that was looking a bit spare. The Dietes is apparently indigenous, and the Rhoeo is referred to as 'naturalised' - and I haven't had a chance to figure out what I'm doing with that front bed yet, so it seemed a good spot!

Hen & Chicken / Spider Plants (Chlorophytum comosum)
Licensed under Public Domain via Wikimedia Commons 
I dug down about a spade deep throughout the whole bed, except for a spot you can't see in the bottom left hand corner - the spot that gets the least sun. I got all the rocks out by hand then used them to make the mini terraces - something I had missed when irrigating in the bed above it. The terraces help to prevent soil from washing away in heavy rain, and help to dam water slightly, and I plant slightly taller plants (like peas) directly in front of the terraces for minimum shade impact on the plants behind them. 
Click on the image above to view a larger image.
I raised the beds slightly by digging soil out from the path. I also spread 4 bags of compost around - it didn't go as far as I'd like, but it will have to do until my own compost is ready. I did this whole bed myself in a day - I felt quite stiff and sore for a couple of days afterwards, but it helped me come to the conclusion that gym would be a waste of time for me! Gardening is a full body workout for sure!

Once the preparation was done I planted this bed with some brassica seedlings that were ready to go - Romanesco Broccoli, Sugarloaf Cabbage, Red Acre Cabbage, Green Sprouting Broccoli, and Chou moullier Kale. I also planted beets and turnips in alternating sections, as well as Greenfeast and Oregon Sugar Pod peas just in front of the terraces, lettuce bordering the path for easy reach and spinach wherever there was a space. Against the wall I planted some red onion seeds and some baby onion plants. In between all of these I put some nasturtiums, marigolds, comfrey and sweet basil.

In the picture below you can see plastic circles on the right - those were lids from polystyrene take away containers with a large hole drilled in them that I placed around the base of each seedling with the name of the type of plant written on it - all those brassicas can get confusing! It worked well until we had uncharacteristically strong wind for two days in a row... But by that time the plastic labels were the least of my worries! It does give you an idea of the spacing I used for the brassicas though.

The full side bed - view from my kitchen window!
Click on the image above to view a larger image.
Anyway, I was so glad to have that second side bed done. In this pic you can also see the herb garden in the top left hand corner. I want to use the little shelf below it for my larger seedlings - like my moringas. You can also see all the Rhoeo plants stacked up on the far left before we were able to transplant them.

In May we also did an overhaul of the bottom garden - the one you have seen most often in the blog so far. That involved cutting down the Natal Fig that was growing into the wall - you can see my gorgeous hubby working on it there - and also weeding the next batch of weed seeds that had come up. As much as it feels like a losing battle sometimes, every batch of weeds seeds that sprout and grow before I've managed to plant, is a batch of weeds that I won't have to pull out later!

The bottom garden.
Click on the image above to view a larger image.
There is still so much to be done in this bottom garden! We need to make some basic terraces, get rid of all the builder's rubble, and the syringas and possibly put some aquaponics / hyrdoponics gutters up on the wall... This whole area is about 500m2 altogether so there really is lots we can do! But, it all takes time and effort and sometimes a bit of cash too. So we are just taking it step by step  - increasing our own capacity as we increase our growing capacity. 

I feel like I haven't said very much in this post - but I think these images serve as important 'before' pics for the 'during' and 'after' pics that are coming soon!


Friday 17 July 2015

May 2015 Part I - Harvest time!

Turnips, Bok Choi, Jalapeño Chillies and a Carrot...

I know turnips are great to add to soup, and I got some 'Early Purple Top' turnips in my Late Summer / Autumn Seed Pack from LivingSeeds so I though I should give them a shot. To be honest, I don't know if I even like turnips, but I do love planting teeny tiny seeds in the ground and getting actual food out! And I'm always up for trying new ingredients.

Fast forward a few weeks and I go into my garden and turn this aside...


...to find these:

They were so beautiful I didn't really want to peel and chop and cook them quite yet - so I took a couple more photos...


I won't bore you with my photographic study of turnips, because we actually managed to harvest a few other things in May... like these gorgeous green jalapeño chillies...


This wasn't even all of them!  I got quite a good stash - enough to make three bottles of sliced pickled jalapeño chillies. It was also my first attempt at lacto-fermentation using this recipe - it was super simple and the result was delicious! It's basically just sliced garlic and sliced jalapeños in a brine mixture, left on the counter for a few days. Check the recipe linked above to get the exact proportions and precautions though! I can't wait for my next batch to make more - they were a hit at our hamburger evening! I'll definitely be writing more about lacto-fermentation in the future - so watch this space. 

Another veggie that you don't often find at the shops here, and if you do it usually looks rather sad and wilted and/or it is crazy expensive, is bok choi. It has always been a favourite of mine so I ordered some seeds especially. Did you know that bok choi and turnips are both the same species - Brassica rapa? Crazy eh? Apparently turnip greens are quite nutritious, but if I definitely prefer bok choi greens myself! And it is such a pretty plant - I love the contrast of the glossy dark green leaf and the bold white vein structure... it almost seems a pity to eat it - maybe I'll just take some photos...


Does one ever get over the joy of getting food from the ground?
And beautiful food at that? I'm sure I never will.

I will always have bok choi in my garden if I can - I'll find a shady spot for them in summer and harvest them small if necessary as they tend to bolt / go to seed when the weather is too warm...

I sometimes put fresh baby leaves in salad, or give it a quick stir fry with some garlic and soy sauce, or I make this great winter warmer - Chicken, Ginger and Bok Choi Soup (Adapted from this Epicurious recipe)

  • 2l chicken stock (4 Knorrox Stock Cubes or 2 Stock Pot Containers with 2l hot water) 
  • 1 punnet mushrooms, sliced (I just use the regular button mushrooms - a punnet is 180-220g. I leave them out if I don't have any)
  • 30ml minced, peeled fresh ginger (It really is worth it getting it fresh and grating it yourself.)
  • 45ml fish sauce (You can get it from most grocery shops - A bit pongy but adds great flavour!)
  • 15ml soy sauce
  • 15ml sesame oil (I get this from Gorima's Spice Shop in KZN - I'm sure you would find it at your local Asian shop)
  • 3 cups / 750ml Bok Choi, thinly sliced (I usually put in a bit more)
  • 20ml rice vinegar (Also available at most of the larger grocery shops, and of course at Asian food shops)
Make sure you have everything ready before you start - it's quite quick from start to eat!
Bring the first three ingredients to the boil, then bring the heat down and allow to simmer for 3 minutes, add the next three ingredients and simmer for 2 minutes, add the bok choi and simmer for another 2 minutes, add rice vinegar and stir.
Check for salt and pepper and serve!

And before I forget - the carrot. This was the biggest carrot in my first batch of carrots that nearly didn't make it - at least it looked big from the top, about 3cm across! So I did feel a bit disappointed when it faded out so quickly... But I certainly wasn't disappointed by the colour - this was cosmic red for sure. I demolished it all by myself rather quickly - it didn't even make it inside the house. It was delicious, so sweet and so cold. (English boffs will recognise that line from here.)

I can't wait until the rest of them are red ready!

It's those moments where you can walk into your garden and fetch most of your ingredients for supper that make all of the dirty hands worthwhile! People do sometimes ask me if it really is worth the time and finance and energy to plant your own vegetables, and my answer is that I'll make sure it is! To that aim though, whenever I do harvest something, I weigh it and record the number of items (if relevant) in my gardening journal - so that I have a record of the weight of food produced by each bed over a period of time. Just simple record will help me to know how I'm doing year on year, and help me really work out if what I'm doing is 'worth it' and perhaps inspire others to try the same thing!

As I take the builder's rubble out of my soil, I have to put something back in, so getting compost from my garden waste will be my next step - watch this space!


Thursday 16 July 2015

April 2015 Part I - Colourful Carrots, Spectacular Sunsets, and the last few tomatoes

Spectacular view from my veggie garden!
And coincidentally, all the colours
of the carrots I'd like to grow!
So lets start with the carrots... I'm trying to get my girls to eat more vegetables, so when I ordered my seeds from LivingSeeds I deliberately tried to get the differently coloured varieties - usually purple or pink varieties because my girls will eat anything pink! I kid you not, one of their top favourite foods is beetroot - and the more the beetroot can change the colour of the food around it, the better! Pink rice, pink meat, pink everything!

Here in South Africa we generally eat beetroot pickled i.e. boiled, then coarsely grated or sliced, and preserved in vinegar. It is served as a condiment or side dish with a main meal.

Speaking of pink, did you know you can get a fantastic variety of carrot colours? I ordered three different colours - standard orange (Cape Market) - and the grandiosely named Cosmic Purple and Atomic Red (There's also Lunar White and Solar Yellow - next time!).

The first batch I planted in the previous post didn't do too well. The planting instructions said to use hessian / sackcloth to cover the seeds once planted to prevent drying out, and to remove it once the seedlings were showing. All good, except I only had sheets of cardboard (still left over from the move) and even though I did make sure they were soaked I think they didn't let enough light through, or something, so my many of my baby carrots just didn't make. I had a severe case of gardener's guilt. 

The few that did come up out of the 100+ seeds I planted, which was about 9 or so, seem to be doing well. We did have another little hiccup in our vegetable garden. As much as Ali, our once-a-week garden muscle man, is incredibly helpful, transplanting beetroot seedlings into the spaces left by the other plants I managed to kill in my vegetable garden was not one of his most helpful moments. Apparently you shouldn't transplant beetroot seedlings or plants as the root gets bent and the beet doesn't grow properly. I got to see this for myself! But I guess we're all on a learning journey, and so we soldier on!

Back to carrots though, I planted carrot bed #2, and used an old, nearly transparent bed sheet torn in half to provide the cover this time. 

This is the spot where my first batch of tomatoes grew (you can see them here). As they died off I thought this would make a good carrot patch, so I used our old burglar guards to let the remaining tomatoes keep going in the background - apparently carrots and tomatoes are good companion plants, and you can also see a couple of Jalapeno chilli plants that I didn't have the heart to pull out also carrying on there.

So I weeded the bed, raked it, used the stick part of the rake to press lines into the bed, sowed the carrot seeds quite thinly, covered them over with a little sand, added the bed sheets (anchored with rocks) and kept the bed moist until the seedlings came up. Let's hope this batch is more successful than the last! 

If you were standing in my garden looking at my carrots, and you took a few steps back, this is what you would see:


Carrots and tomatoes are on the far left, with the struggling melon patch with some more tomatoes and Jalapeno chillies to the right of that. The orange shelving was in my daughters' room, but has been co-opted to house my seedling trays. You can see the land slopes away from there - more on that bed later! Closer to the front you can see some grass was taken out - that was to make space for my checkerboard herb garden- which you can read more about here.

One thing I love about gardening is the colour of it! Seeing beds change from brown to green, tomatoes from green to yellow, or red, or just staying green because it's okay to be a green tomato, it's all beautiful!


Some yellow pear tomatoes from my aquaponics setup. I just missed one of the fish lurking in the background!


The last of my tomatoes from my inherited tomato plants. You can see a patch of minor sun scald on the big one at the bottom and right in the center. They tasted great though!

Don't forget to have a look at my herb garden here, but before you do that, please do subscribe!

April 2015 Part II - Where to plant your Herb Garden - 6 tips!


Every gardener needs a herb garden!

Herbs are one of the most satisfying things to grow, but deciding where to put your herb garden can be a challenge!

Below you'll find the 6 factors I considered when deciding where to plant a herb garden - the beginnings of which you can see in the picture on the right.

#1 Does it get enough sun?

I thought this spot would be a good one as it gets a reasonable amount of sun, in summer and winter. Generally, herbs need around 4-6 hours of sunlight a day, I think in winter this spot gets 4-6 hours of afternoon sunlight, but in our generally subtropical climate I think this will be fine.

#2 Environmental considerations: Slope? Wind? Rain? Drainage?

Steeply sloped ground can allow rain to wash your herbs away and make it difficult to access what you need, unless you terrace it of course, but may also mean that your top herbs get very dry while the bottom ones get waterlogged.

Italian Basil Baby!
On the other hand, some permaculture fundis build spiral herb gardens with hardier herbs at the top and water loving herbs at the bottom. Maybe try experimenting with both?

Most herbs need moderately rich, well drained soil - so clay soil or boggy areas won't work. It helps to use a spot where the plants will get rain when it does rain. Forgetting to water my plants is a big weakness of mine - I like to let nature help when it can! A spot that is too windy will stress your plants, and dry them out - so take that into account too. It's customary to dry herbs for storage only once you've picked them, not while they're still in the ground.

Calendula
#3 Can the ground be better used?

You may have more than spot that could be used for a herb garden, but if one of those spots would work particularly well for another function, then it would make sense to put your herb garden in the other spot. In our case, that ground was just an odd corner of lawn that was just begging to be made into some kind of flower bed anyway. I love digging up useless bits of lawn and replacing them with productive patches of green goodness!

#4 Will your animals or kids have access to it?

Italian Flat-Leaf
Parsley seedlings
Growing any kind of flower bed or herb garden in the path of your pets or children is unwise. The delicious munchies could get eaten by pets of the vegetarian pursuasion, while boisterous dogs might see your budding blooms as nothing more than a soft bed for bounding through or lying in or digging up. With our herb garden it was next to a path, in a corner as I mentioned, and on the edge of a retaining wall, so no risk of animals bounding through! Our current count of vegetarian pets is 0, so no worries there.

#5 Will you have access to it?

There is no point in growing gorgeous herbs that you have to trek through the wilderness to find. Try to plant them in a spot close to the kitchen, perhaps even in view of your kitchen window. You'll be far more likely to go and fetch what you need if you can get to it reasonably easily! Having said that, a good position for growing is more important than a good position for harvesting!

#6 Will it add to the aesthetics of your garden?

Pelargonium / Geranium bush
Herb gardens can be quite aesthetically pleasing. They display a variety of colours and textures and shapes and heights, and they give off the most delicious smells when walked through. They also lend themselves to interesting arrangements as you try to give each plant its own spot and make each plant accessible.Try to take advantage of the prettiness factor and use your herb garden as a focal point. In our case the spot we chose was right next to our entertainment area: close enough to show off, but far enough that it wouldn't get trampled. Great spot!

Planning 
As you can see in the picture, I worked mine out on a basic checkerboard pattern for maximum accessibility. I still have to get the pavers that will go where the grass is now. I have only implemented the right-most half of the plan so far, with plans to implement the left half soon. You can see how the pavers make a diagonal path through the herb garden to allow access to my top veggie garden.

I currently have the following plants in my herb garden:
  • Rosemary (donated)
  • German Chamomile (from seed)
  • Flax (from seed)
  • Burdock (from Peter's Gate)
  • Yarrow (from Peter's Gate)
  • Mint (from cuttings)
  • Lemongrass (planted in a submerged pot - from Peter's Gate)
  • Curry Tree (from Peter's Gate)
  • Lemon Tree (from local nursery)
  • 'Dog Gone' (Plectranthus caninus - from Peter's Gate)
  • Calendula (from seed)
  • Lovage (from seed)
  • Italian Flat Leaf Parsley (from seed)
  • Melissa / Lemon Balm (from the nursery)
  • Lettuce (from seed)
  • Marigolds (from seed)
  • Pelargonium / Geranium (donated)
Echinacea Daisy just peeking out
Currently growing from seed for phase 2:
  • Sage (donated seed)
  • Thyme (donated seed)
  • Marjoram (donated seed)
  • Stevia (Seeds for Africa)
  • Echinacea (Seeds for Africa)
  • Oreganum (Green Guy seeds)
  • Bronze Fennel (donated seed)
  • Chives (Green Guy seeds)

The 'must-haves' that are absent from this particular spot - my lavender, sweet basil, perennial basil, chives, comfrey and nasturtiums - all have spots elsewhere.

'Dog-Gone' - I sprinkle leaves from this
deter my dogs from going into particular beds -
it does seem to have helped!


I'm aiming for a medicinal and culinary herb garden eventually, although practically I think my culinary herbs would be interspersed with my veggies, while medicinal herbs will stay in the herb garden, but we'll see how it goes! If you're wondering what some of them are for, like yarrow and burdock for example, so am I! That's kind of why I grew them - so I could figure it out along the way.

What are your 'must-haves' in your herb garden?


Monday 22 June 2015

March 2015 Part II - Our first big planting!

Our first foray into the wilderness...

If I was you I'd wonder what this crazy woman is doing posting pictures of organized dirt. I agree, that's what it looks like right now! But that's the thing about gardening isn't it? Understanding that I can facilitate good growth, but I can't force it or speed it up. When organised dirt becomes an oasis of edible greenliness then everyone wants a pic!

Recovering perfectionist confession time: those pictures of established gardens intimidate and even paralyse me - I won't get my garden looking like that in a weekend, or a month or even a year, so why try?  So maybe my ineptitude will  encourage to start your own garden.

I read once that gardening is a great way to teach kids about delayed gratification, as it includes a long period of waiting between the labour and the fruit of that labour. I think it should be compulsory for adults too... Back to the organised dirt:

We have a wonderful gentleman called Ali who comes in to help with some muscle in our garden every Wednesday. You can see in the background of this image how overgrown the space had become with blackjacks and sweethearts and syringa seedlings. This planted area looked just like that until Ali got hold of it! Yay for Ali!

You can see a white railing in the top right hand corner of this organised dirt image - that is where the original picture was taken from. 

So what have we got here?
I had bought some seeds from Living Seeds in February - including their Late Summer / Autumn Starter Pack - and planted them on the 24th of that month - so I had some seedlings ready to plant a month later as you see them here. I started with the 6 beds on the right, and added the 3 on the left later. 

Even though you can't see all of it - these are the plants I have in this spot:
(Links redirect to LivingSeeds.co.za)
Marigolds
Forget-me-nots
Bok Choy / Pak Choi
Nasturtiums
Spring Onions
Lettuce
And some Sweet Potatoes I grew from slips from my mom-in-law

Still in seed trays:
Onions

You can see the diagram I made in my gardening journal - although in the diagram the bottom edge is the edge of the garden against the wall - as if you are leaning over the railing looking at the garden from the top. 

I know it doesn't look like much right now, but there's a whole lot of potential under that soil! I have been known to go check my seeds the morning after I sow them - waiting for seeds to germinate is a big challenge for me! But I guess that is one of the difficulties about gardening - we can only give a good environment as far as it's up to us - but that seed has to do its work all on its own in the dark underground!

The soil down here is very sandy and full of weed seeds so it looks like we'll just need to be vigilant with our weeding.for a while. I did have a chance to let a batch of weeds germinate so I could pull them out all in one go, and not let them go to seed - but beyond that we just have to keep at it. For these beds I aerated the soil up to a spade's depth and removed rocks where necessary. The paths you see are made of discarded roof tiles left by our previous owners - upcycling builder's rubble for the win! There was some lovely black compost from the garden refuse pile, also left by the previous owners, so I mixed that in where I could. You can see I used some straw over the beds on the left - actually, it was dried grass from the plants we cleared - but it does the same job!

I know I could have raised the beds more and done more to improve the soil, but I just wanted to get plants in there as soon as possible!

So join us to see how it grows! Make sure you subscribe so you can see the 'after' shots of these 'before' shots!

Tuesday 16 June 2015

March 2015 Part I - Swimming with the fish

Starting with a list of our failures is not the way to inspire confidence... trust perhaps, but not confidence! 

But we are on a journey and journeys sometimes have flat tyres and detours - we fix them and we move on and tell tales about them when we get where we were going!

Seeing as we only recently moved in, and getting our rentable spaces ready for tenants is the biggest priority right now, our aquaponics has taken a bit of a back seat. First of all it took us a while to be able to fetch our gear from our previous house. And by that time many of the plants in our system had died. 
Perennial Basil,
Yellow Plum Tomato plant
and one of our Koi

When we were able to fetch our system, we brought the fish over first. We had Koi and Tilapia in one system, but the Tilapia died soon after the move due to a number of factors - not the least of which was the fact that we didn't have sufficient filtering capability without the rest of the system i.e. the planter. We really struggled to filter the Koi water sufficiently so made it a priority to fetch our planters. It was a good lesson for us about how efficient the planter actually was as a filter!

We cleaned the existing fish pond, mounted the planter on some bricks in the middle and got the pump going - the water went from soupy to crystal clear in a couple of hours! You can see the Koi pond here with some perennial basil dominating and a little yellow plum tomato plant peeking out on the right. For the planter we just used a black Big Jim crate, which originally had a bell siphon in the centre as we wanted to try an ebb and flow system. (If these terms are confusing right now, don't stress!) But not it is a continuous flow system.

You can see the pond in the far corner of the property in the picture of the pool. There are 4 Koi in this system currently - about the limit for this pond I think! I made the remark that I wished our swimming pool water was that clear as the Koi water and that got us thinking - what about a natural pool / fish pond / aquaponics reservoir all in one. You can see the work of South African natural pool companies here and here.

Our pool is massive - 11.5m x 6m - and over 2.2m deep in the deep end so it works out at over 120 000l. And the pool pump leaked so we had to keep filling it up until we fixed the leak, until it sprung another leak... Oh bother! It just seems such a waste to spend all that time and money and chemical input to keep a pool dead. I'm sure it can't be healthy soaking yourself in that much chlorine on a regular basis - I'd much rather support a natural balance!

By Clear Water Revival (Own work)
via Wikimedia Commons
The whole interior needs resurfacing anyway, and with such a huge pond we can easily afford to use some of the space for a gravel bed and some water plants. I'm not sure if we'll be able to afford the finance to do the whole thing this winter - but I'm hoping we can do it next winter!

From what I already understand of natural pools, they use water plants and a gravel bed as the filter - we are guessing we won't need so many water plants as we'll also filter the water through our aquaponics system. Most natural pools we've seen don't incorporate fish - I'm sure there is a way to do it though. We are thinking of making it possible for fish to use the whole pool when there are no human swimmers, but simultaneously providing a designated spot they can retreat to while there is swimming going on. If anyone gets squeamish about swimming in the water with the fish, I'll remind them that people swim in dams and lakes and in the sea all the time!

In the image of our pool above, you can see another black crate to the left of the pond - that is actually a crate resting in an old bath that has been sunk into the ground, with a small solar powered pump - another aquaponics system in the making. That system doesn't have fish in it currently - but we are getting there! 

What we did get from that system though is a batch of lettuce seeds as pictured here - your lettuce plant will get to a point where it 'bolts' i.e. the stem grows longer - culminating in a flower head. These flowers bloom and then later close and start to dry out. 

Lettuce seeds are ready to be picked when the flower heads are fluffy i.e. ready to fly away. Pick them and rub them between your fingers to release the seeds, then blow gently to lift the chaff. 

You can see two different types of seeds - dark and light - in the image here. I got these particular lettuce plants in a mixed pack, so I'm happy to mix the seeds. Apparently lettuce varieties don't cross readily - this makes seed saving quite simple!

Speaking of seeds, this image of my seedlings and cuttings, taken past 7pm in the evening, gives you an idea of when I get to do my gardening! I made a joke on Facebook the other day about how when you are working full time you can't get all your gardening done in the daylight hours - 

'Some call it urban permaculture, 
I call it 'Gardening in the Dark'
You can see some Sansevarias on the left in this image - I found a plant at a nursery that was practically bursting the growing bag it was in - so bought the plant and split it into a number of individual plants that I could put in my house - and give away as gifts! 

The polstyrene containers were rescued and recycled and I used to plant my herbs seeds and various small cuttings I collected. The plastic storage baskets have worked really well for storing my seed trays - I can bring them in if it is too hot outside, or if the rain is too heavy, but can put them outside when necessary. 


March was quite a busy month - so look out for Part II of our March update!

Until then, what are your thoughts on natural swimming pools? Have you ever swum in one? (other than an actual lake or dam!) If you have a swimming pool yourself, would you ever consider converting?